Guys, today I am going to tell you that how to create a facebook bot with javascript.
Here is a step by step guide:
Prerequisites
-
A facebook developer account – Go to the following url: https://developers.facebook.com and log in with your existing facebook account.
-
A facebook page.
-
Basic Javascript knowledge and experience in NodeJS.
Setup and Tools Used
Guys, I’m going to use cloud IDE c9.io for development.
Basically, it is an online integrated development environment which supports hundreds of programming languages such as:
- PHP
- Ruby
- Perl
- Python
- JavaScript with Node.js and
- Go.
It provides a virtual machine with command line access where you can install anything, write code and preview it.
Getting started with messenger bot development
-
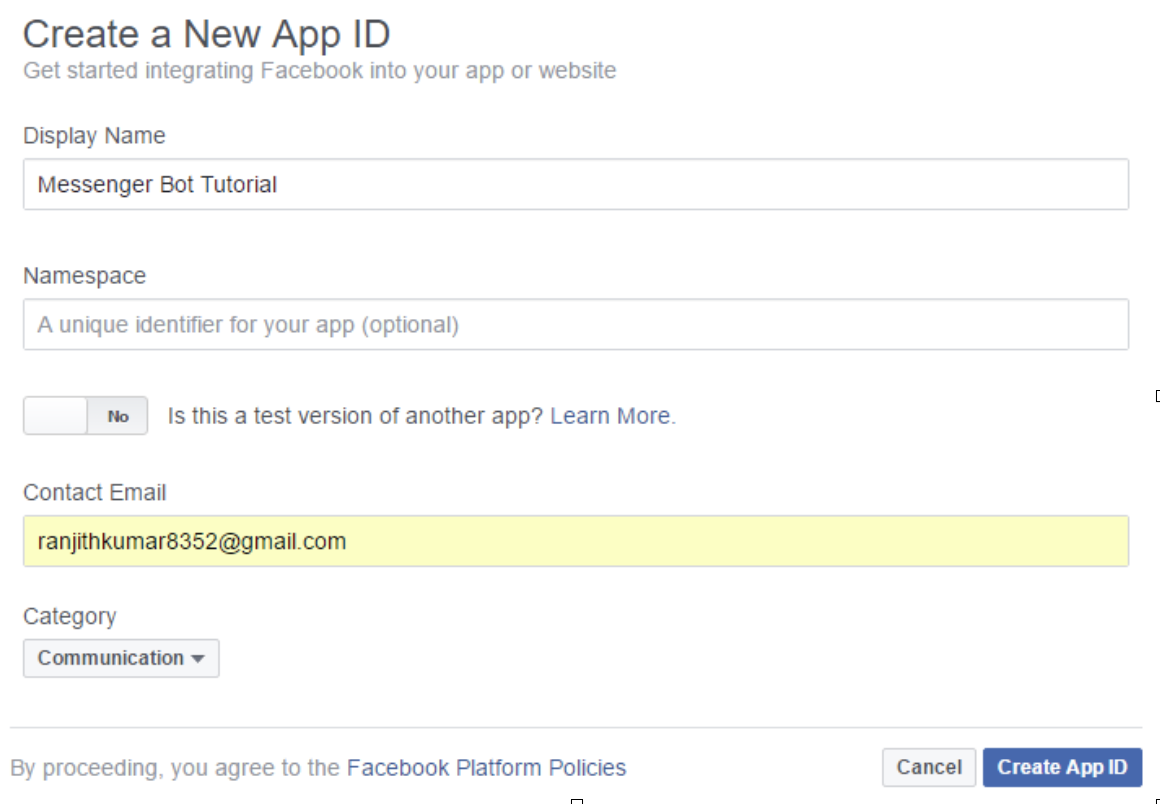
First of all, we have to create a new app. For this, Go to https://developers.facebook.com/apps
-
Create a new app > click on use basic setup.

-
After creating an App Id click “Add Product.” Select “Messenger.” in app dashboard.
Now In messenger settings you have to select the page which will be used as bot identity. A token will be generated to send messages.
If you don’t have any then create a new facebook page.
- After this, you have to set up your workspace.
- Create a Cloud9 account and login.
- In your dashboard click on Create new workspace > enter a name > select Node.Js in choose template and click Create workspace.
Make sure to select public workspace. If your workspace is private then change it into public workspace in setting from your C9 dashboard.
Basic verification
With a specific end goal to setup webhooks for your messenger bot, A small verification is done by messenger platform to verify ownership and ensure webhook URLs are secure. Lets complete that confirmation and then write code.
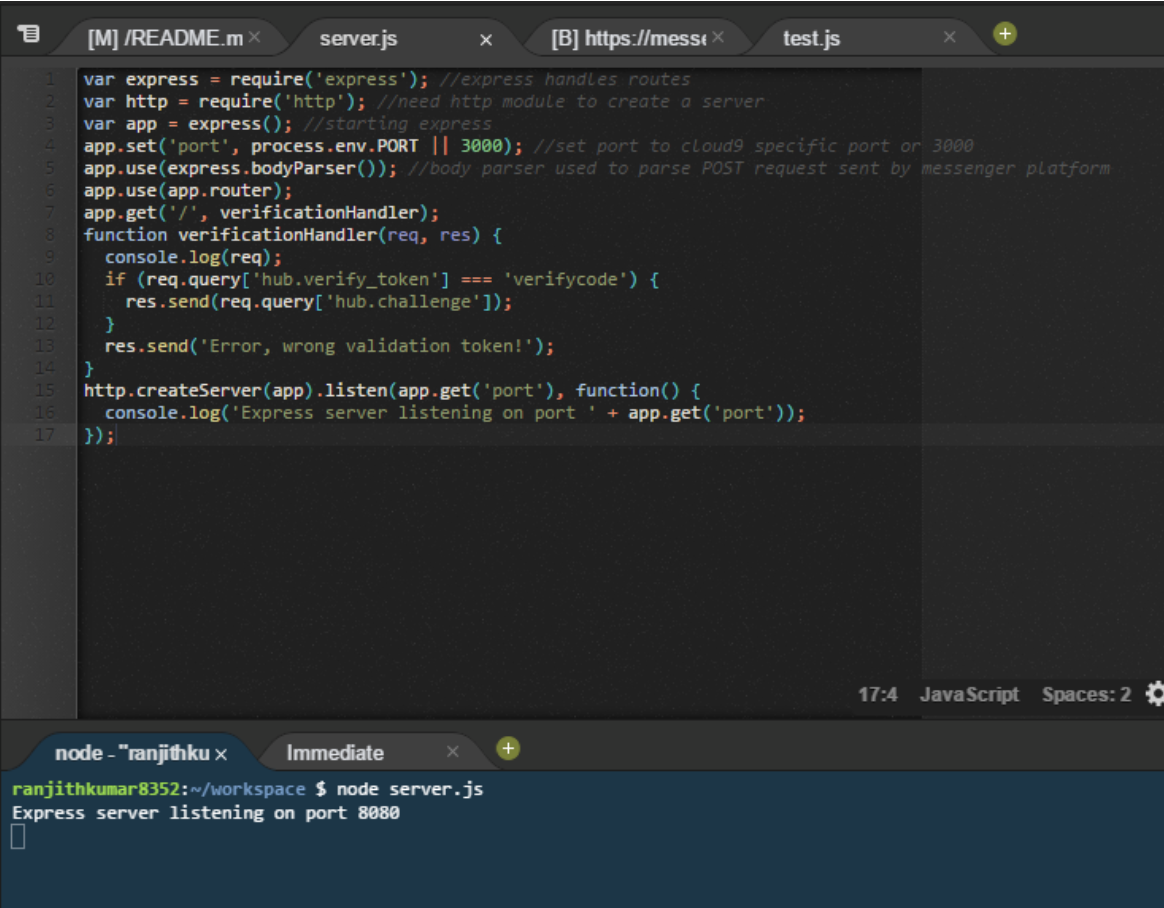
Open server.js, replace all the code with below one :
view sourceprint?
var express = require('express'); //express handles routes
var http = require('http'); //need http module to create a server
var app = express(); //starting express
app.set('port', process.env.PORT || 3000); //set port to cloud9 specific port or 3000
app.use(express.bodyParser()); //body parser used to parse request data
app.use(app.router);
app.get('/', verificationHandler);
function verificationHandler(req, res) {
console.log(req);
if (req.query['hub.verify_token'] === 'verifycode') {   res.send(req.query['hub.challenge']);
}
res.send('Error, wrong validation token!');
}
http.createServer(app).listen(app.get('port'), function() {
console.log('Express server listening on port ' + app.get('port'));
});
Guys, I’ve used express 3.x in this tutorial, If you are using 4.x version then code has to be changed.
In command line, you have to type node server.js

- Now go to preview > Preview running application > Copy URL
- Now go back to Messenger platfrom in facebook developers account.
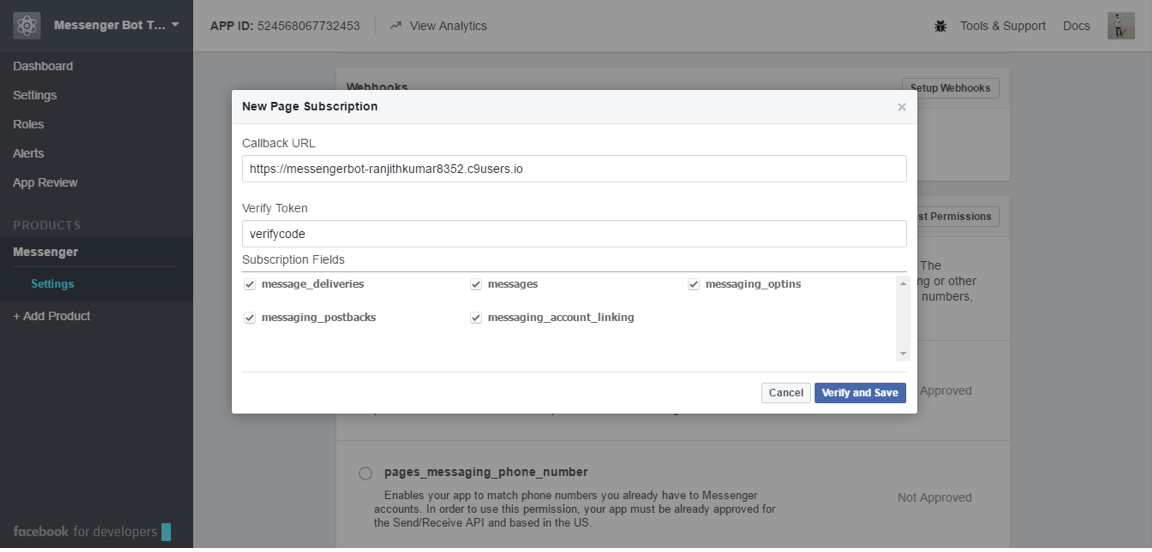
- Click on setup webhooks > paste copied URL in webhook URL and verifycode in Verify Token as shown in image below. Select all subscription fields.

- Click verify and save.
- Messenger platform makes a GET request to your webhook URL along with parameters hub.verify_token and hub.challenge.
This is just a webhook verification and has nothing to do with bot. so don’t think too much about this.
Click verify and save, verification is completed. Now select the page In webhooks section for which you want to subscribe your webhook.
whenever someone sends a message to this page, a POST request is made to your webhook URL.